There’s no more appreciative audience for magic than young children – even the clumsiest sleight of hand can leave them wide-eyed with wonder.
And while magicians aren’t meant to reveal their secrets, most of us aren’t magicians – so there’s no danger of being kicked out of any magic circles when we show our kids how to do the trick themselves.
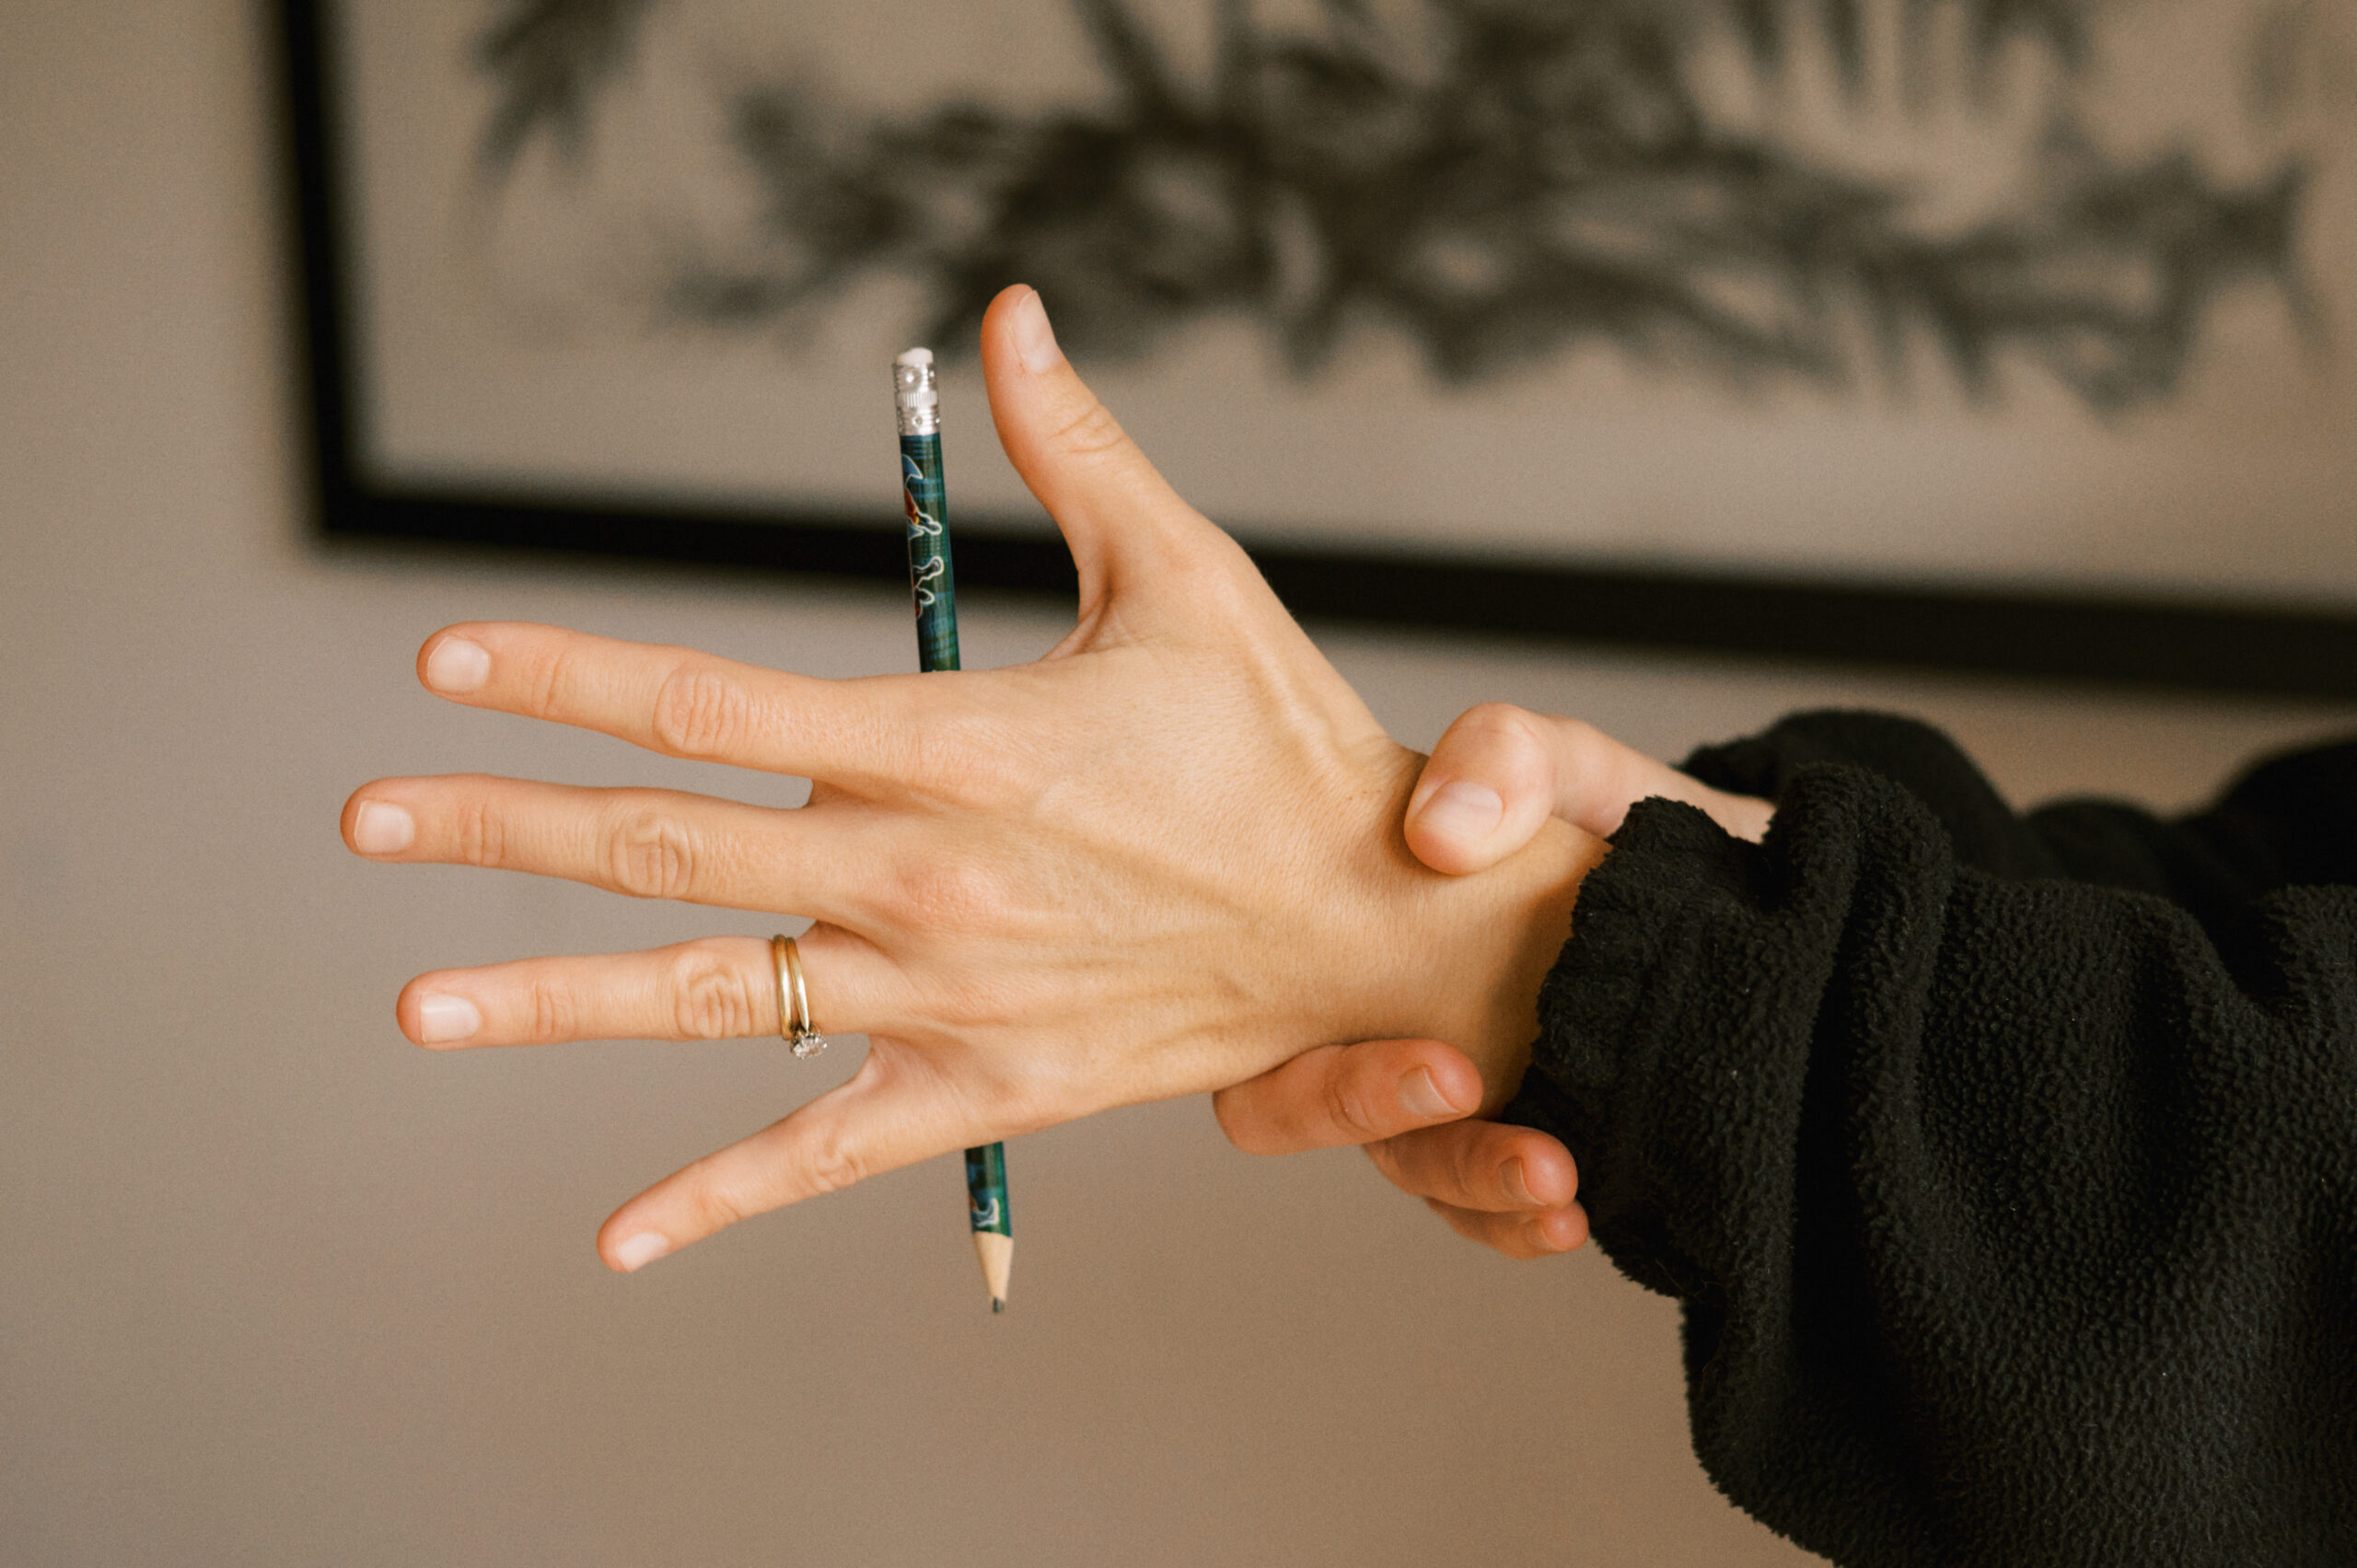
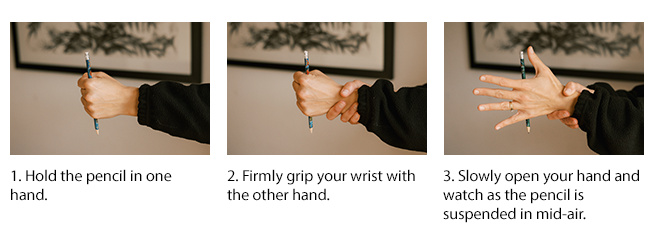
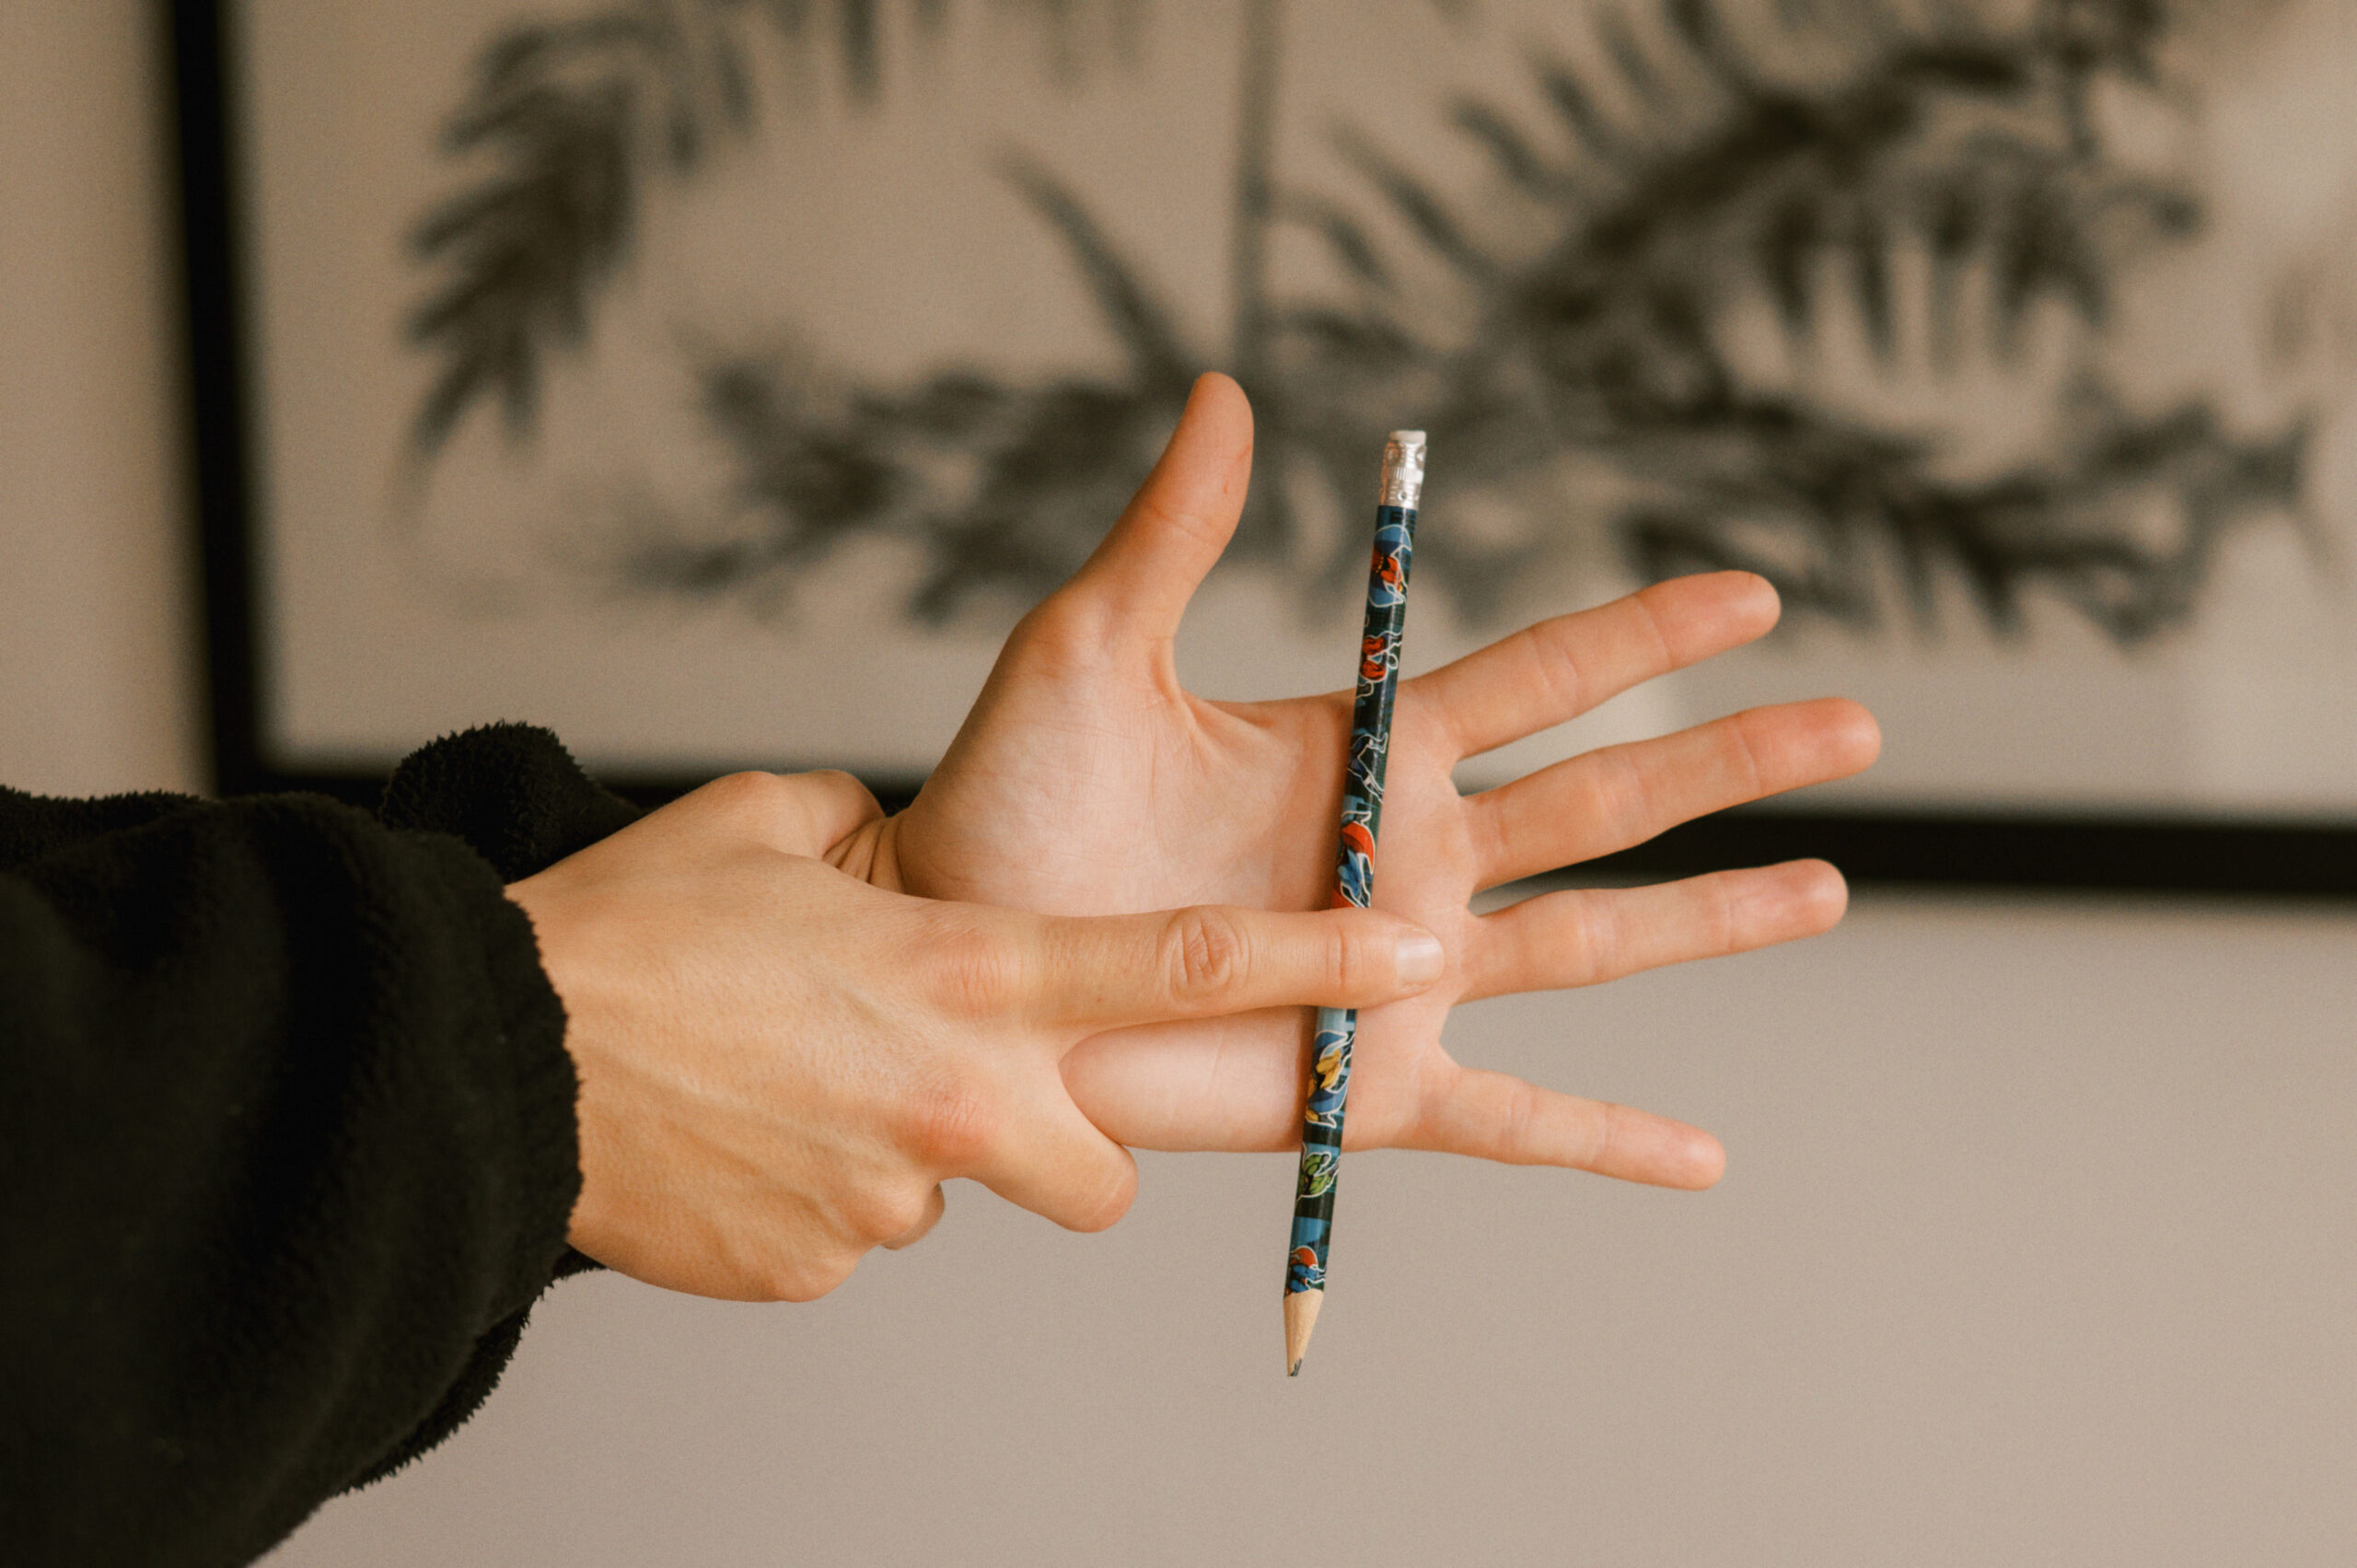
Here’s a simple but surprisingly effective trick you can do anywhere – all you need is a pencil.
If you can’t work it out – scroll down to the bottom to see how the trick is done.
After school activity
Make your own salt dough
~30 mins (+ baking time)
Salt dough is great for arts and crafts projects you want to harden and keep. It’s simple to make, quick to tidy up, and perfect if you’re outnumbered by children of different ages.
Making the dough is part of the fun – a great chance for your kids to get stuck in with some mixing and measuring.
What you’ll need:
250g plain flour
125g table salt
125 ml water
Instructions:
Mix the flour and salt in a mixing bowl.
Slowly add water, stirring as you go.
If the dough is too sticky, add a bit more flour.
If it’s too dry, add a splash more water.
Knead the dough for 5–10 minutes until smooth and elastic.
Shape and mould into models, decorations, fossils etc.
To dry:
Air dry for 1-2 days.
OR bake 100°C (fan oven) or 110°C (non-fan) for 1-2 hours, depending on the size of your moulds.
Once dry, you can paint it.
Weekend project
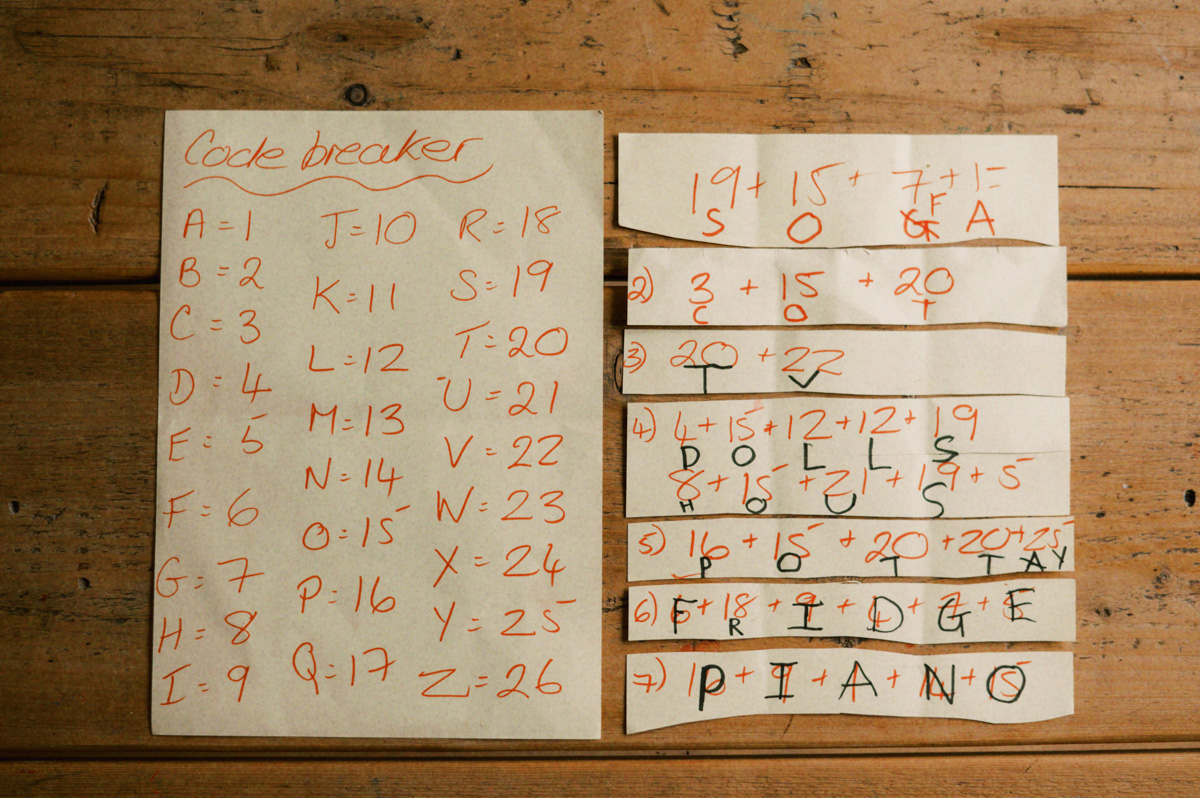
A cipher wheel
~1 hr
Whether you’re raising a future James or Jane Bond, or just want to sneak in some writing practice, a cipher wheel is a brilliant way to make words more fun.
Add a secret mission of your own by sneaking a few spelling words into the messages.
If you don’t fancy making the cipher wheel yourselves, you can download and print a template from here instead.
What you’ll need:
Card
Compass, protractor, ruler
Pencil (and some coloured pens or pencils if you like)
Scissors
1 split pin (paper fastener)
How to make your cipher wheel:
Use the compass to draw one large circle (14 cm diameter) and one smaller circle (10 cm diameter) on the card.
Cut both circles out.
Using a protractor and ruler, divide each circle into 26 roughly equal slices — one for each letter of the alphabet. Don’t worry if they’re not perfect; close enough works fine. (They should be approximately 14 degrees each).
Write the letters A–Z in order around the edge of both circles.
Carefully make a small hole in the centre of each circle.
Place the smaller circle on top of the larger one and fasten them together with the split pin.
How it works
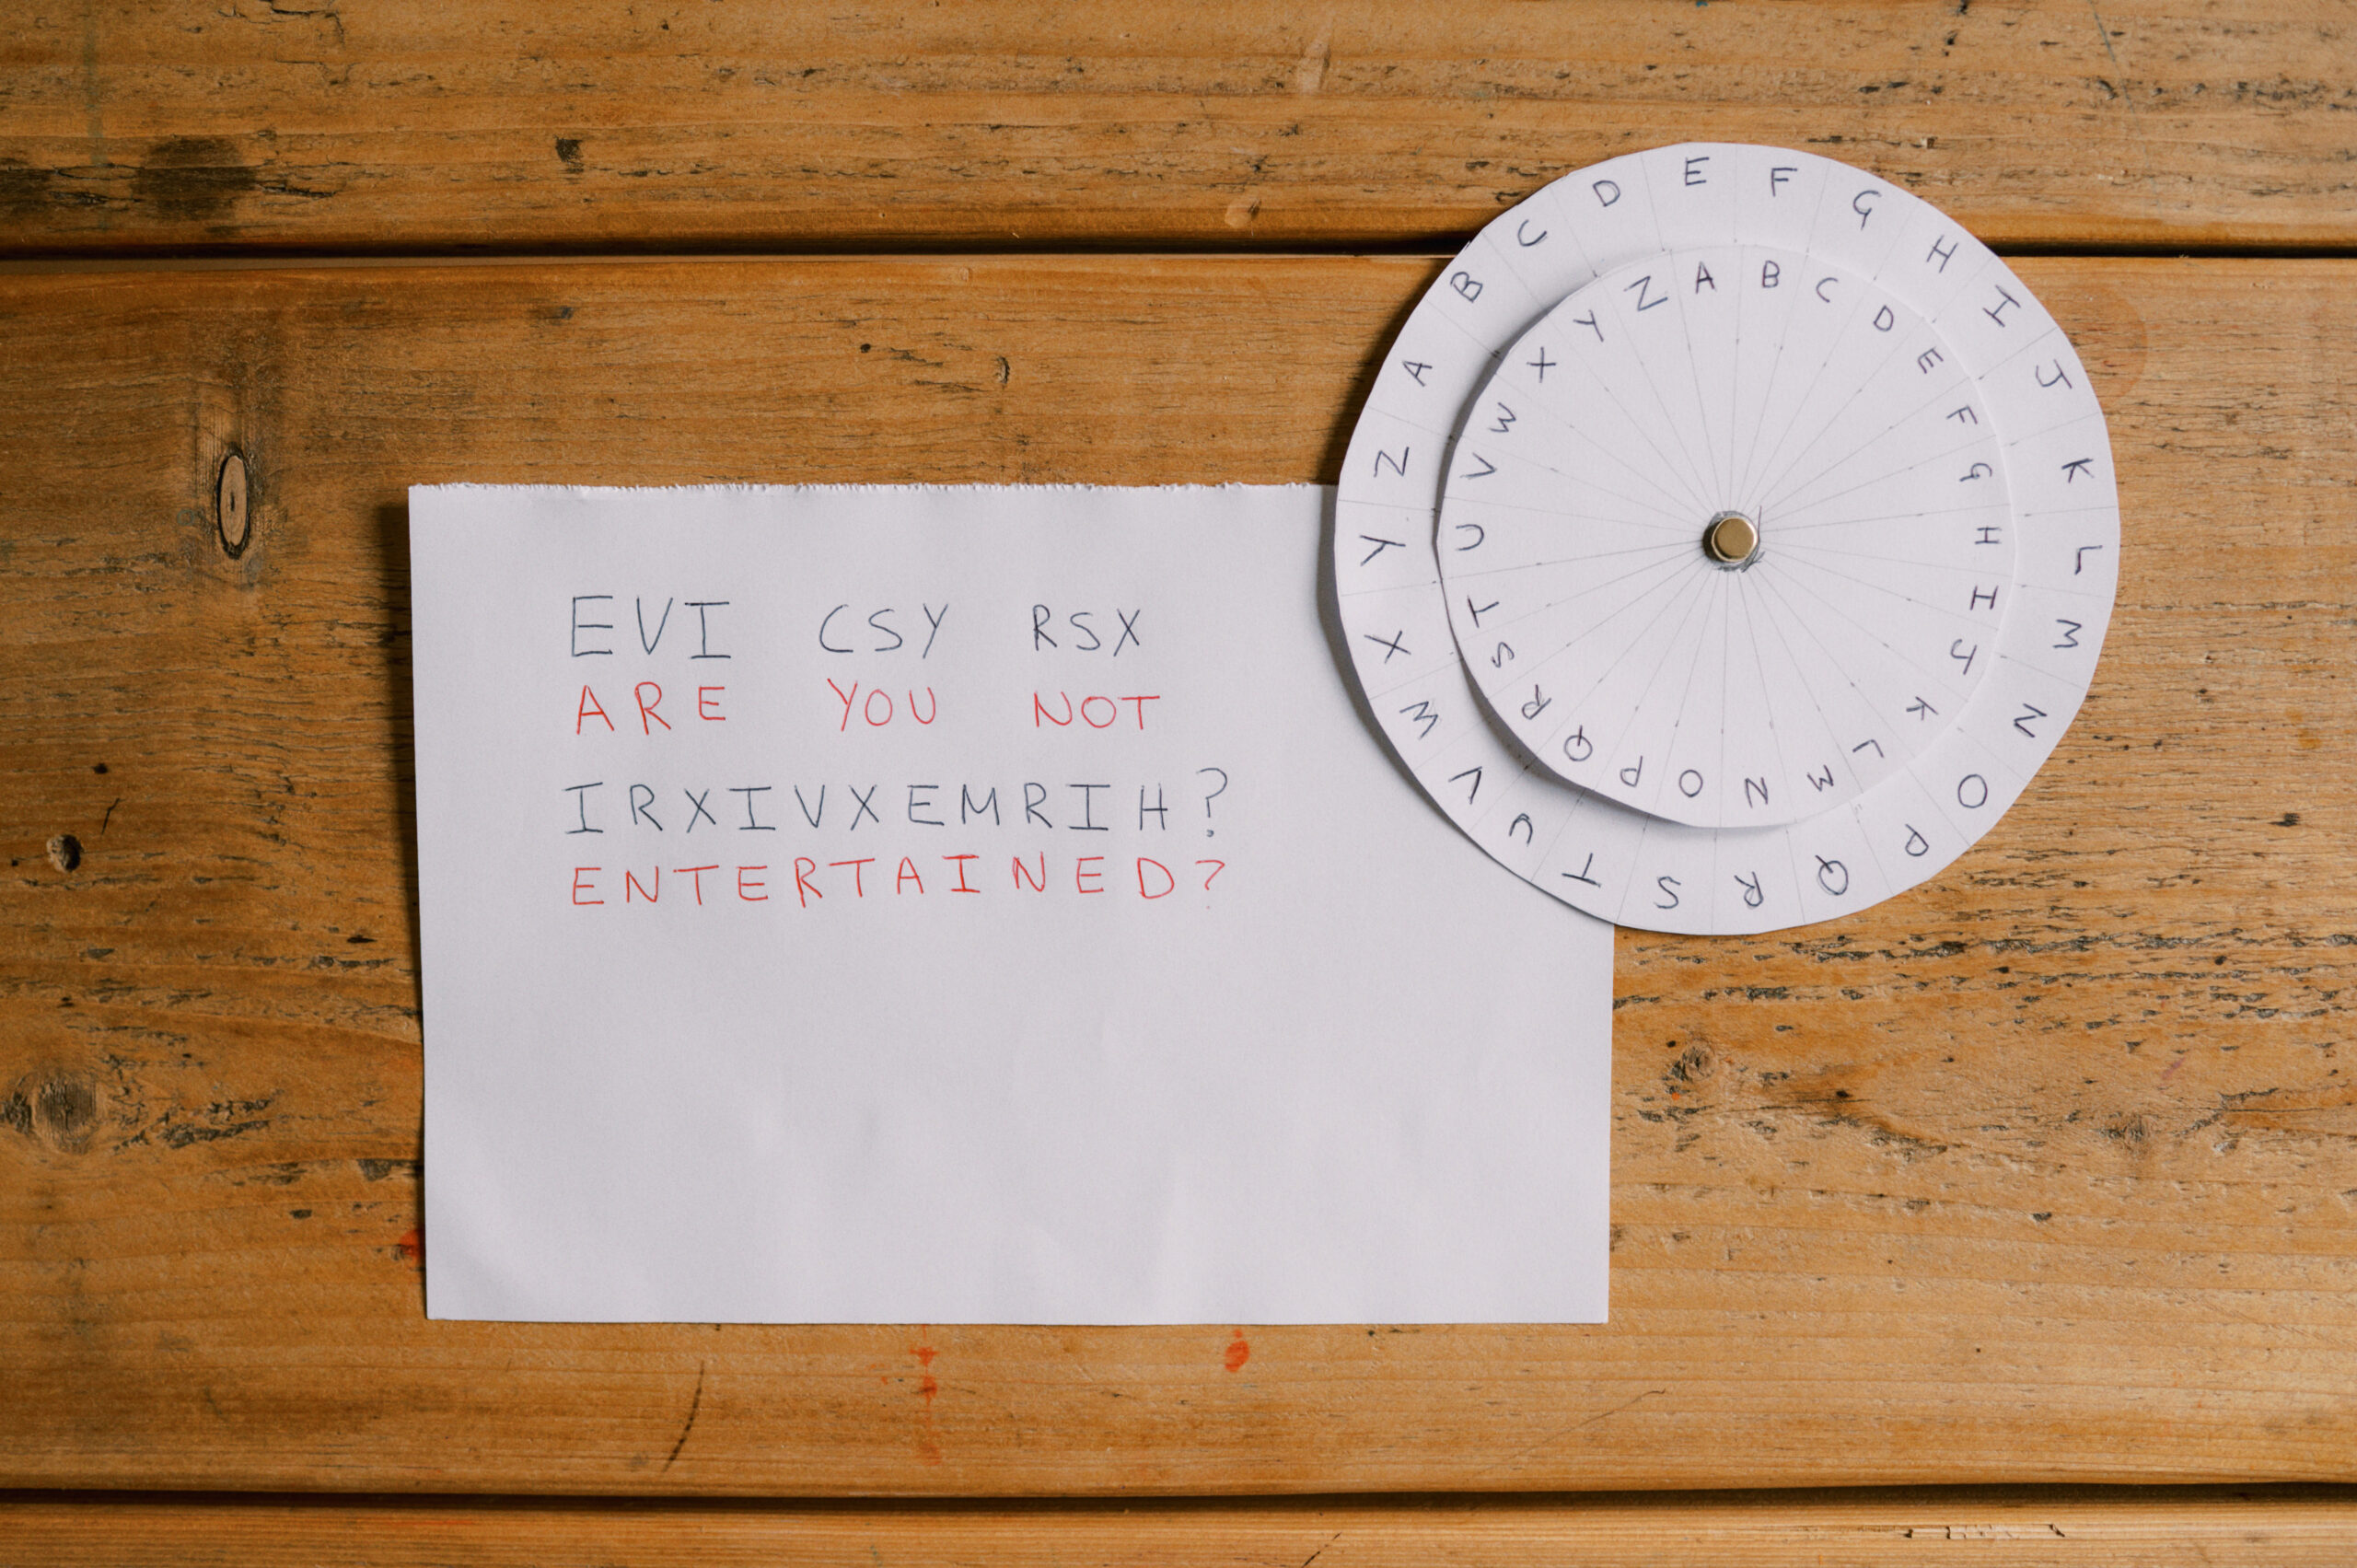
Start by turning the inner wheel so the letters don’t line up — for example, match A on the inside circle with E on the outside.
The real letter (the one you actually mean to write) is always on the inner wheel, and the coded letter is on the outer wheel.
To write your secret message, swap each letter in your word for the one it lines up with on the outer circle.
To crack the code, the other person will need their own cipher wheel and the same “key” — in this case A = E — so they can set it correctly and decode your message.
Until next week,
Harvey
ps. Haven’t worked it out yet? Here’s how the trick’s done.
Share your creations with us online using #TheParentsPlayBook
Three for Thursday
You can sign up to our newsletter to get three fresh play ideas straight to your inbox every fortnight.
Thank you for subscribing to the newsletter.
Oops. Something went wrong. Please try again later.